How to Standard Scull in Synchronized Swimming
June 17, 2019


Standard scull is the first of many types of sculling that a synchronized swimmer should learn. It is—as the name clearly states—one of the standard skills used in synchronized swimming and the technique used for everything from ballet legs to eggbeatering.
Here is a guide for getting started with, and learning how and when to practice, your first scull.
You can start learning the proper technique for standard scull before you even get into the pool.
Hands Down
Here is the first of two ways to learn the standard scull on land:
- Find a flat surface, like a desk or even the floor.
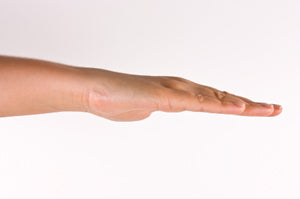
- Place your palms down against the flat surface.
- Slide your hands in toward each other so that your thumbs get closer together. This is called the in-scull.
- As you slide them in, tilt the thumb side of your hands up a little so that part of your hand comes slightly up off the surface.
- Now slide your hands away from each other, tilting them so that the pinky finger sides tip up. This is called the out-scull.
Layout on Land
A good way to think about how your hands should be moving is to imagine that you are piling sand. Push the “sand” in towards the center to make a little mound and then push it back out to the sides.
This is the exact movement your hands will make when you are using standard scull in the pool, only you will be actually pushing water instead of imaginary sand.
The second way to practice proper technique on land is by lying down on your back to simulate sculling in a back layout position.
- Lie down on the floor as if you were doing a back layout link.
- With your hands by your sides, bend your elbows until your hands are next to your hips.
- Now move your hands in and out, simulating the same standard scull technique that you tried on the flat surface.
Here are two easy ways to get started with your standard scull in the water:
Standing on the Bottom
Get the feeling of using the water but without having to worry about holding yourself up.
- Start standing in the shallow end of the pool.
- Practice the hand movement in Step 1 out in front of you, just like you did when your hands were on the flat surface.
- As you scull in and out, imagine piling the sand, using the sensation of the water to help you visualize proper technique.
- Continue until you get a feel for the pressure of the water on your hands and it becomes easier to repeat the movement.
In a Back Layout
Another way to practice your standard scull is in a back layout position. Use the wall of the pool to help you until your scull is strong enough to hold you up.
- Place the balls of your feet on the side of the pool so they are resting on the edge of the pool’s gutter. Point your feet (or you’ll slip right off).
- Stretch out into your back layout position with your hands by your hips.
- Try out your standard scull, keeping your hands deep enough in the water so that they don’t ruffle the surface.
- Use the water pressure from your scull to help keep your layout flat and at the surface. Being able to utilize that force is the goal of the standard scull—work for that goal!
- Stretch long from head to toe. This will help you in your efforts to flatten out your layout and get more of your body to the surface.
Now that you’re getting the hang of standard scull, you can do laps to strengthen it. But first, you need to know how to travel.
Headfirst standard scull: Most often, standard scull travels headfirst in a layout. To start traveling, tip your fingertips up toward the surface, pushing yourself away from the wall your palms are facing.
Reverse standard scull: To move foot-first, tilt your finger tips down toward the bottom of the pool. It will feel like you are doing very tiny breaststroke pulls with just your hands. This is called reverse standard scull.
To practice: Do one lap of standard sculling and then one of reverse standard sculling. As you get stronger, you’ll be able to do both laps connected, without sitting up or resting in between.
Getting the Basics Down
Once you learn how to standard scull, you’ll realize how useful it will be every single time you’re in the pool. If you keep practicing, you’ll be doing laps with a ballet leg, or two, in the air before you know it.


