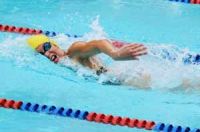
How to Side-breathe in Freestyle
January 22, 2024

It can be incredibly frustrating to try to breathe while sinking, getting water in your mouth, or completely stopping in the water! These are very common swimming problems that are linked to side-breathing. If you’re having trouble mastering your side-breath, this guide outlines some simple steps for you to learn to breathe more easily.
To learn how to side-breathe, start on the wall. That way you can focus solely on your breathing without the distraction of having to keep yourself afloat.
Float & Kick
Lie face-down in the water with your arms outstretched in front of you. Grip the gutter, and kick light freestyle to keep your body afloat. Exhale all of the air out of your lungs. Then, tilt your head to the side to breathe.
Try both sides to see which side feels easier to you. Stick with the side you like best.
Exhale
Exhaling is an important step. If you don’t blow all of the air out of your lungs before you tilt your head to breathe, then you’ll have to exhale with your head tilted. This slows your breath. Additionally, it can cause a hitch in your stroke which will matter when you’re swimming without the board. It’s very difficult to stay afloat if you’ve got your head turned to the side for a long time.
Relax
As you tilt your head, relax your neck and try not to turn your body. Pretend that someone has tapped you on the shoulder, and you’re turning your head to take a look. Instead of twisting your whole body, only your chin should move near your shoulder.
Keep Your Lower Lens in the Water
 While breathing, think about the goggle lens that’s lower in the water. Part of this goggle lens should stay in the water. In order to get your mouth out of the water, move your mouth to the side to make sure you don’t swallow water.
A fun way to think about breathing properly is “pirate breathing.” Pretend that you’re wearing an eye patch on the eye that stays lower in the water. Keep part of your “eye patch” in the water. When pirates say “Arrrr,” they move their mouths to the side. Move your mouth in the same way when you breathe.
Look Behind You
While you’re breathing, you want to relax your neck and make sure that you’re not breathing forward. Instead, try to look slightly behind you. This will make it easier to keep your body in alignment and make your side-breath smoother.
Look Down
After you’ve completed your breath, turn your head back down so that you’re once again looking at the bottom of the pool. A big mistake that swimmers make after taking a breath is that they glance forward. Looking forward drops your hips in the water, causing you to sink. This will lead to serious problems in your stroke, because it will be difficult to keep swimming.
Continue to cycle through your breath a few times until it starts to feel easier and more natural. Make sure you don’t rush through this step. The more comfortable you get with breathing at the wall, the simpler the next steps will feel.
After you’ve spent some time practicing the side-breath on the wall, it’s time to venture out a bit. Grab a kick board to assist you in this next step.
Exhaling Arm & Breathing Arm
While performing this drill, you will have an “exhaling arm” and a “breathing arm.” What this means is that you’ll exhale while taking one arm stroke, then breathe to the side while using the other arm. Use the side that you’re more comfortable breathing to as your breathing arm.
Exhaling
Grab a board and hold it out in front of you. Once again, start at the wall. Grip the board with both hands reaching straight out from your shoulders. Lock your elbows. Make sure your eyes are looking down, with your face in the water.
Now, push off the wall and start kicking freestyle. With your exhaling arm, perform one freestyle stroke and then grip the board again. While performing this freestyle stroke, exhale completely.
Breathing
Once you’re gripping the board again with your exhaling arm, take a stroke with your breathing arm. As your arm pulls underneath the surface, tilt your head to the side to breathe. While you breathe, look slightly behind you toward your armpit. This will help keep your body in alignment, and smooth out your breath. By the time your arm exits the water, put your face back in and look down toward pool floor.
The board should help you balance in the water, and give you some good support while you try to time your breath. Don’t move on from this drill until you feel that you’ve mastered your side-breath.
Once you feel comfortable side-breathing without a board, you’re ready to practice your side-breath with regular freestyle. You no longer need to pause your arms out in front of you.
When you feel you’ve mastered your side-breath, you can switch up your breathing. If you’d like to hold your breath for a few strokes, just remember to pace your exhalation. Otherwise you might run out of air before you’re ready to take a breath.
Conclusion
If you’re able to get through these steps, you’ll be able to swim more easily and for longer durations. You are on your way to becoming more confident and comfortable in your swimming! Just remember: Relax, exhale, and look down after your breath.


