How to Do the Ballet Leg in Synchronized Swimming
June 17, 2019
The ballet leg, a synchro swimmer’s signature move, can be learned within the first week of practice but take years to master. Even at the Olympic-level, athletes continue to work tenaciously on their ballet legs by doing laps and laps of the skill as a standard part of their daily workout.
This guide is designed to teach you how to perform the ballet leg figure. There are also some tips for improving your ballet legs once you’ve learned the basics. (A right-legged ballet leg is described below, but the steps would be exactly the same if you wanted to switch legs.)
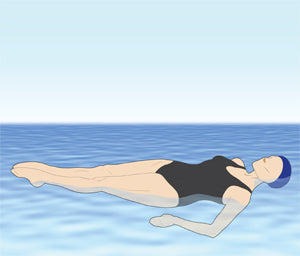
Start in the best back layout position you can do. This will give your ballet leg the best chance of success.

- Extend your entire body, from the top of your head to your toes. Your layout will be flatter if you stretch long, tighten your knees, and press your hips to the surface.
- Maintain good posture with a long neck, and keep your head back, looking at the sky or ceiling.
- Use strong, smooth, standard sculling.

The goal of the bent knee is to have as much air space under your knee as possible.
- Start by bending your right knee, so that it comes up out of the water.
- Keep your right big toe attached to your left leg. Slide the toe along the left side as you bend the knee.
- Stop bending once your right thigh is straight-up.
Once you start moving into the bent knee position, you’ll notice that it gets a lot harder to keep your hips up. Here are some tips to help you get high enough to earn a little triangle of air space underneath your knee:
- Press your sculling down towards the bottom and your hips up to the surface. Shallow sculls are splashy and make you look lower than you really are!
- Keep your elbows bent as you scull. Reaching towards your feet will make you pike more.
The more air space the better!

Remember, this is the trademark position of your ballet leg figure- hence the name!
- Keeping your right thigh still, lift your lower leg up until your leg is straight and pointing straight into the air.
- Check to make sure that your left foot and face are still at the surface, since it can be harder to keep them in position once your leg is up.

Again, keep your right thigh still as you lower your right foot back down to the bent knee position. Strive to keep that triangle of air space as big as possible as you arrive into the position.

It may seem like your hard work is over at this point, but the goal is still keeping your hips up. By the time you end, your hips should be totally dry.
- Slide your right toe down your left leg toward your left foot and straighten your knee.
- Keep pressing your hips to the surface as you get closer to the original, flat back layout position.
- End in the best possible back layout, just like the one you did at the beginning.
Keeping your feet and face up through every position is no small accomplishment. But once you get the hang of it, you may actually have trouble keeping your head deep enough, and if your head sticks up out of the water, everything else sinks.
If this happens to you, try thinking of your body as a seesaw. When one side tips down, the other comes up. If you press your head down deeper in the water, your hips and feet will come up.
Practicing
The sure path to a better ballet leg is practice. Here are some suggestions of some drills and laps that help you improve.
On the Wall
Start in a back layout with the balls of your feet on the pool’s edge or gutter. Use strong standard sculling even though the wall is helping you. Go through the entire ballet leg figure. Have a partner watch and help guide your leg. Make sure that it’s straight. Notice your height and the flatness of your body, so you can try to mimic the correct position when you are off the wall.
Using Equipment:
With Floats:
Hold a jug full of air or floaty in each hand. This will allow you to work on your body position without worrying about sculling. Go through the entire ballet leg figure. Notice how much you can use your body to do a good ballet leg without sculling.
With a Kickboard or Pull Buoy (for more advanced swimmers):
Place a kickboard or pull buoy under your head. Do the ballet leg figure and try to press your head down and your hips and feet up- just like the seesaw!
Single Laps
Starting with your feet at or on the wall, lift to a ballet leg. Do one lap of ballet leg. Get to the other side of the pool using traveling headfirst standard scull. Hold your ballet leg up as long as you can. Laps are done for quality and endurance. Sometimes you or your coach will have you hold your ballet leg up as long as possible without putting it down. At other times, you may only hold it until the quality of the position begins to decrease. Then rest, and start again. Do at least one lap on each leg.
Continuous Laps
Start as if you are doing a single lap. When you get to the end, leave your leg up and switch to reverse standard scull. Do another lap of ballet leg, traveling foot first. To make this more difficult, switch legs after the second lap without sitting up. Do two more laps with the other leg up without stopping.
A Final Note
As your ballet leg improves, it will still be important to practice the basic skills outlined at the beginning of this guide. It may just be a five step figure, but making it as close to perfect as possible will always present a good challenge for even the most advanced synchronized swimmer.


